I'm always searching for a way to create art by using recycled materials -- creative yet functional at the same time. My Mother always loved the popular bi-annual flower, called Lunaria annua,
Honesty, Money Plant or in the US, it is often referred to as the
Silver Dollar plant.
A few years ago, I planted a few money plant seeds in my back yard. The seed package stated these plants were:
1.) Easy to grow -- check.
2.) Heat and drought resistant -- check.
3.) Bloomed beautiful purple blooms -- check.
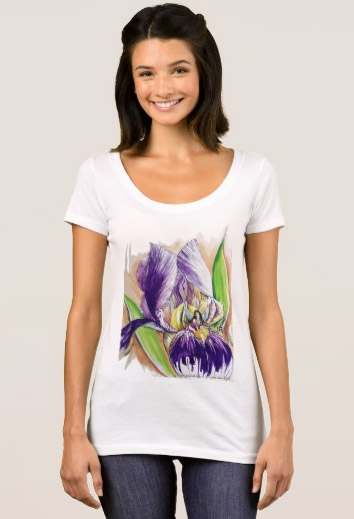
My favorite color is purple and I have added Purple Phlox and even trees and shrubs that have purple blooms to my landscaping.
Regardless, this sounded like the perfect plant for me! The most shocking point of these interesting plant, were once I planted the seeds in the summer, they didn't bloom until the following spring. This is called a biennial.
At first they look much like a weed, then over the winter they actually continue to grow. In early spring this hardy plant takes off, producing a bounty of beautiful purple blooms by mid April. These are a few photos from my garden over the years.
 |
| My Backyard in early April. |
If you leave the plant in your garden long enough, the blooms eventually turn to pods that look like green coins. As they dry over the summer, the 'silver dollar' emerges. Consequently, if you leave the plant standing, the pods will open and tiny seeds will 'reseed' your garden and your neighbors! Yes, I have actually noticed 'money plants' growing in several of my neighbor's yards.
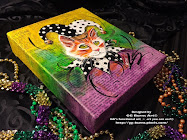
Some people enjoy drying the money plant in their garage. They do make interesting dried arrangements. Personally, I enjoy adding a few with colorful ribbons or attaching to them to gifts containers for my friends.
 |
Functional Art is -- art you can use! © gg's functional art -- 2012
|
One of my favorite things to do is to add seeds from my garden, such as the money plant to handmade paper. I have always enjoyed making my on paper and card designs. Many of my friends are crafters and artist. A favorite escape is to spend special days with these friends either making paper or hand crafting greeting cards. It's a great way to relax.
Some crafters buy expensive gadgets and factory produced paper to make fancy greeting cards. I figure after the amount they spend on tools and supplies, each card produced must cost in the ball park of $20-30 each. I either sell my cards to local galleries, gift shops or give them to my friends as gifts. Some of my friends have framed my cards and over the years have filled up a wall in their homes, with of my art. This makes me smile that my creation is providing someone 'joy or decoration' through out the year.
 |
Money Plant Card with Handmade Paper, by GG
Functional Art is -- art you can use! © gg's functional art -- 2012
|
When I use the recycled-hand made paper for greeting cards ... I often comment that the cards I make are 'gifts that keeps giving'.
Some of my handmade papers were made with recycled napkins, fibers, scrap paper and seeds -- using a mold and deckle, as image below.
This is a messy, time consuming process that can take days to produce 30 sheets of textured paper.
There are many books, websites and videos that explain the paper making process. This video is a basic way to learn how to use paper making kits or modify your own methods:http://www.youtube.com/watch?v=qklJIKejb3c
Making Serendipity Paper
with GG Burns
Several years ago, I found a marvelous technique, on the Internet. It is
basically a fun crafting project that anyone can do. Children and
adults of all ages, enjoy this technique. I use paper napkins, recycled
wrapping paper, paper and fabric scraps, all layered in a bed of white glue.
Over time, I developed my own twist in making this paper and have enjoyed sharing it with many friends and students.
Here's how I make it: tear off large sheets of freezer paper, placed on
top of several layers of newspaper. Cut, tear, shred, or punch out
shapes of scrap pieces of scrap-book paper, colored tissue paper, card
stock, colorful paper napkins, bits of fibers -- ribbon, lace, torn
pieces of old music books, punch-outs or anything you want -- on your
paper.
Dilute about 4 ounces of Elmer's® Glue in 2 parts water in an old
plastic bowl. Stir until you have a the mixture the consistency of
soup. Paint a small amount of glue with a disposable brush onto the
freezer paper first. (Shiny side up.)
Then I think about what kind of theme I am wanting to create. Such as Christmas, Halloween, Autumn or Valentines. For example, if I have a lot of vintage paper scraps, I might want to put
down a piece of sewing pattern, or even a sheet of netting or lace
first. Often, I will place an unfolded napkin down first -- then layer my
scraps/fibers on the top. Sometimes you can dip your scraps or fibers into
your glue mixture as you apply to your craft area. Other times,
continue adding glue as you layer on your pieces. The key to the process is to encase everything with
the glue. When the entire piece is dry, it will easily peel off the
freezer paper.
Allow your finished Serendipity image to dry overnight, before you try to peel it away from the freezer paper.

The finished 'Serendipity Paper' can be cut in all kinds of shapes for
card making, gift tags or even framing. I find that a rotary cutter
works better than a craft knife. Depending on how many layers you add
they can be almost like a thin piece of vinyl.
The most important thing is to let yourself go (as a child) and have fun with this technique.
Each card or art creation made using this technique is unique, one-of-a-kind gift -- suitable for framing. Or if it has seeds from my garden -- planting!
Most of GG’s cards include a package of seeds that actually makes this gift one that continues to give joy to the recipient year after year.
Functional Art is -- art you can use! © gg's functional art -- 2012
_____________________________
© 2010-11 GG's Functional Art ~ All rights reserved.
None
of the materials provided on this Blog may be used, reproduced or
transmitted, in whole or in part, in any form or by any means,
electronic or mechanical, including photocopying, printing, or linking
without permission in writing from GG Burns. Removal of electronic
copyright information, digital fingerprints, or embedded watermarks on
any image is strictly prohibited.


 Beautiful music by Sam Hawkins from Versailles, KY.


